Monday, August 22, 2011

The summer is flying by.......


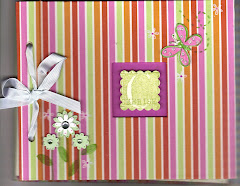
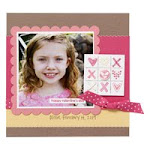
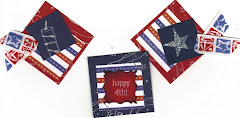
Stampin'Up! has some beautiful new colors! Just in time for some new school projects, gift ideas and of course great for scrapping, card making and decorating. This summer is flying by, but there is always time for creating and crafting! Gather a couple friends, make a pitcher of ice tea and see what fun and colorful items you can make, because there is nothing better than friends, fun and socializing over a crafty summer afternoon!

Thursday, January 20, 2011

January is flying by.....


Time to start thinking about those sweeties in your life that deserve a little something special on Valentine's Day! Paper crafts are great for the giving! How about a frame, a card, a photo box or a little hand crafted sentiment? My husband and son love their personalized items and especially when I add few extra embellishments like ribbon or buttons! I will be back to post soon. Please email me pictures of your creations! I would love to share them here with our fellow paper craft artists!


By the way, I will be creating coordinated kits you can order online or purchase at my next workshop! Take care and thanks for visiting often!

Tuesday, September 7, 2010

Using the technique

Here is a little brag book I made for Reece's first birthday. I pre-made all the pages so Jen and Tim can insert their favorite photos and journal a bit. I used the same circle stamp background through out all the pages and stayed within the same color family for paper and accessories. This way it can be filled with one event of just favorite moments.

      
The top cover page demonstrates the color pallet, the center is a good photo of the background stamp and the third photo shows a close up of some of the accessories. I shared my use of a stamp as creating a background. I can't wait to see yours!

Thursday, August 26, 2010

Technique Reminder - Using Background Stamps

Don't you just love simple techniques! I have quite a few of these large stamps from S.U. collection. I like to use them for making cards and also for stamping scrapbook pages, so I just thought I would post a refresher. Hope you enjoy! I will be back later this weekend to post some creations. I hope to have a little time to finish up on a couple projects and I actually have compiled about two albums worth of pages! Yahoo and happy paper crafting to you too!

Background Stamp Tech Cust


1]   With the background stamp face up, ink the stamp completely by tapping the ink pad on the rubber.
2]   Place the background stamp face up on your stamping surface.
3]   Place the card stock on the inked stamp.
4]   If the card stock is smaller than the stamp, cover the card stock with a piece of scratch paper.
5]   Rub the card stock with smooth, firm strokes, making sure to rub all areas of the stamp and to keep the card stock from sliding.
6]   Remove the scratch paper and carefully lift the card stock off the stamp.
QUICK TIP
Create a multicolored background by applying two or more inks to the background stamp.


Background sample cust

Monday, July 26, 2010

July Card Challenge

Okay, I took my own cardmap challenge and here are a couple of my weekend creations. A his and her bday card. I used supplies on hand including, paper scraps, stickles, my cricut and stamps. I also used some inexpensive note cards as the base. I hope you enjoy them!

Tuesday, July 20, 2010

Distressing your paper crafts made easy!


Distressing Essentials includes tools that make it easier than ever for you to create a distressed, vintage appearance on your projects. Includes the following tools:

■ Sanding block and emery board for distressing Designer Series paper or smoothing the edges of paper that has been adhered to chipboard
■ Precision files for sanding intricate die cuts and sanding in tight areas
■ Blendable vintage ink and stamp for creating an aged appearance: Tea Stain, Charcoal, Mahogany, Navy ink
■ Because vintage ink contains alcohol, they are not recommended for scrap booking


The New Stampin'Up! Distressing Kit is just $19.95. Contact me today and I will be glad to send you the new 2010 - 2011 Stampin'Up! Catalog! The New Catalog Idea book is free with a $50 purchase or just $5.00 with any order. 

Sunday, June 27, 2010

Something for Sunday

It is so nice today and I was thinking about making a couple of summer cards and saw this technique on the Stampin'Up! website. Sometimes it is nice to go back to the basics and use some of the supplies I have on hand. I thought you might like this technique. For some of you it is a refresher and for others it is a simple way to create some new looks your cards, scrapbook pages or paper craft ideas. As always, I hope you share the projects you have made. I would be glad to post them. Enjoy your week!


Technique A: Chalking
1]   Apply pastel color to your card stock or paper with a sponge-tip applicator, cotton swab, sponge dauber, or stiff paintbrush.
2]   Blend the colors as desired with the applicators or blender pen. When using blender pens, just touch the pen directly to the corner of the chalk to pick up the color. 


Technique B: Poppin' Pastels
1]   Stamp the image with a white Craft Stampin' Pad or VersaMark® ink pad.
2]   Use sponge daubers to apply the pastel color directly to the ink.
3]   Blow off any excess powder. (Repeat this process if you are using this technique with a Two-Step Stampin' set.)

QUICK TIP To avoid smearing, gently dab the chalk rather than rubbing it across the image. 

Sunday, June 20, 2010

Happy Father's Day


Back to the basics! I decided to stamp and hand color my cards today. I also love to you my ink pads and daubing sponges to add color around the stamp and create additional scenery. I hope you enjoy them! I would love to see some of your creations as well! See you soon!

Sunday, June 6, 2010

Summer is on the way!

There are so many things happening during the month of June! Graduations, weddings, birthdays, Fathers' Day and of course the start of Summer! A great photo opportunity month and what a great time to enjoy making some fun gifts, cards, or layouts. I also love to make framed art and give as a gift, or how about some cute swizzle sticks for a summer luncheon or family gathering. Just email me and I would be glad to send you the list of the Stampin'Up! items used to make both of these projects. Happy Crafting!

Sunday, May 16, 2010

May is National Scrapbook Month

Why not try the challenge? Pagemaps.com had some cute layouts and I thought it would be fun to post a couple here to try! Enjoy using the maps or combined them with some techniques posted here as well. Then email me your creations and I would love to post them!


Here is another technique to use - Masking!
1]   Stamp image on card stock.
2]   Stamp it again on a piece of scratch paper.
3]   Cut carefully around the scratch paper image, cutting just inside the lines; this will be your mask.
4]   Place the mask on top of the card stock image.
5]   Stamp another image over a portion of the mask to create layered, interacting images.
6]   Remove the mask to see the finished look. 
7]   To stamp a partial image, use tape to cover the part of the stamp you don't want to appear, ink the stamp, remove the tape, and stamp the image.
QUICK TIP
To ensure that the mask stays in place, stamp image on a Post-It® note.


Happy Scrapping and Paper crafting! 

Say it sweetly!

Say it sweetly!

Journal special moments!

Journal special moments!

Mix brights with pastels!

Mix brights with pastels!

Colors and patterns add a special touch!

Colors and patterns add a special touch!